Email Integration - Activities

STS Cloud has two features that allow you to easily send emails into your database capturing the notes above your signature line and creating a completed activity in STS Cloud. This eliminates the manual copy and pasting of email notes into STS Cloud activities.
Any activity created with a time (i.e.-Site Tour, Attending a networking event, etc.) will be added to your User Dashboard in STS Cloud and a copy will update in your Outlook program once you set the iCalendar up within your email program.
Users are given two items that will work with any email program:
- A custom Email Dropbox address
- A custom user URL to build a second calendar in your email program
EMAIL DROPBOX:
To use your email dropbox address:
1. Click the Utility Wheel next to your name
2. Click Settings for your Username
3. Verify that the email address listed in your Personal Information section matches the email address used in your Outlook, Gmail, etc. *This is a security setting and both need to match*
4. Scroll down the page to Integrations
5. You will see your custom email address
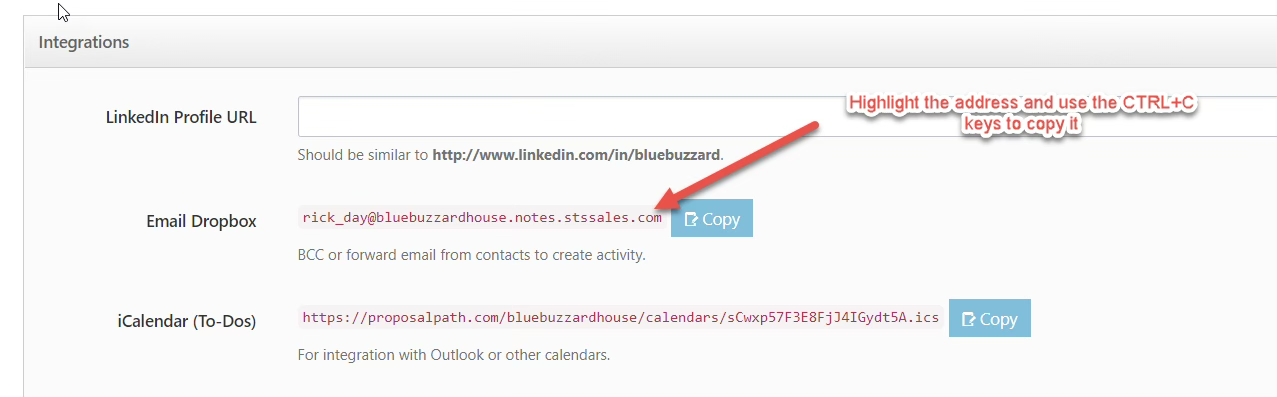
6. Highlight the address and click the CTRL+C keys to copy this address
7. Open your email program and click 'New' for a new email
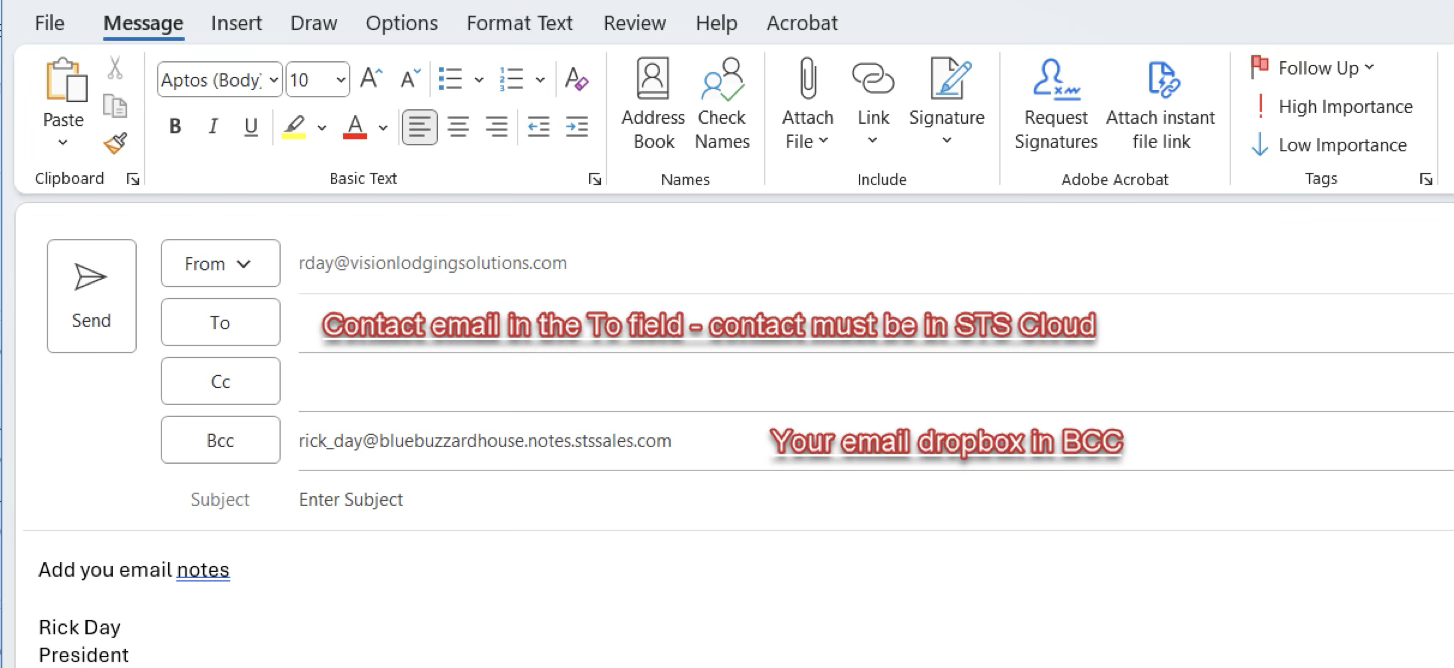
8. Enter the client email into the 'To' field
9. Use CTRL+V to paste your STS Email address into the BCC field (then clients do not see you doing this)
NOTE: Salespersons can determine when they want to use this to capture their email notes as needed. Once you have copied the email dropbox into the BCC field initially, you can quickly type the first letters of your address in the BCC field to pick and add to future emails as you need to use it.
10. Type your email as usual.
NOTE: Once you click send and the client receives the email in their Inbox, a copy of your email is sent into your STS Cloud database. The system will locate the client email and create a completed email activity, saving you time from having to copy and paste notes manually. Once processed in the system, you will see a completed email activity in the Account History.
PERIODIC EMAIL DROPBOX CHECK IN STS CLOUD:
You can periodically check STS Cloud to ensure emails are auto-connected to your contact/account.
Click the Tools icon in the top menu bar to access this feature. This can be done weekly.
(HINT: Sometimes a user may have a client email in their Outlook, but the contact in STS Cloud may be missing or have an incorrect email address)
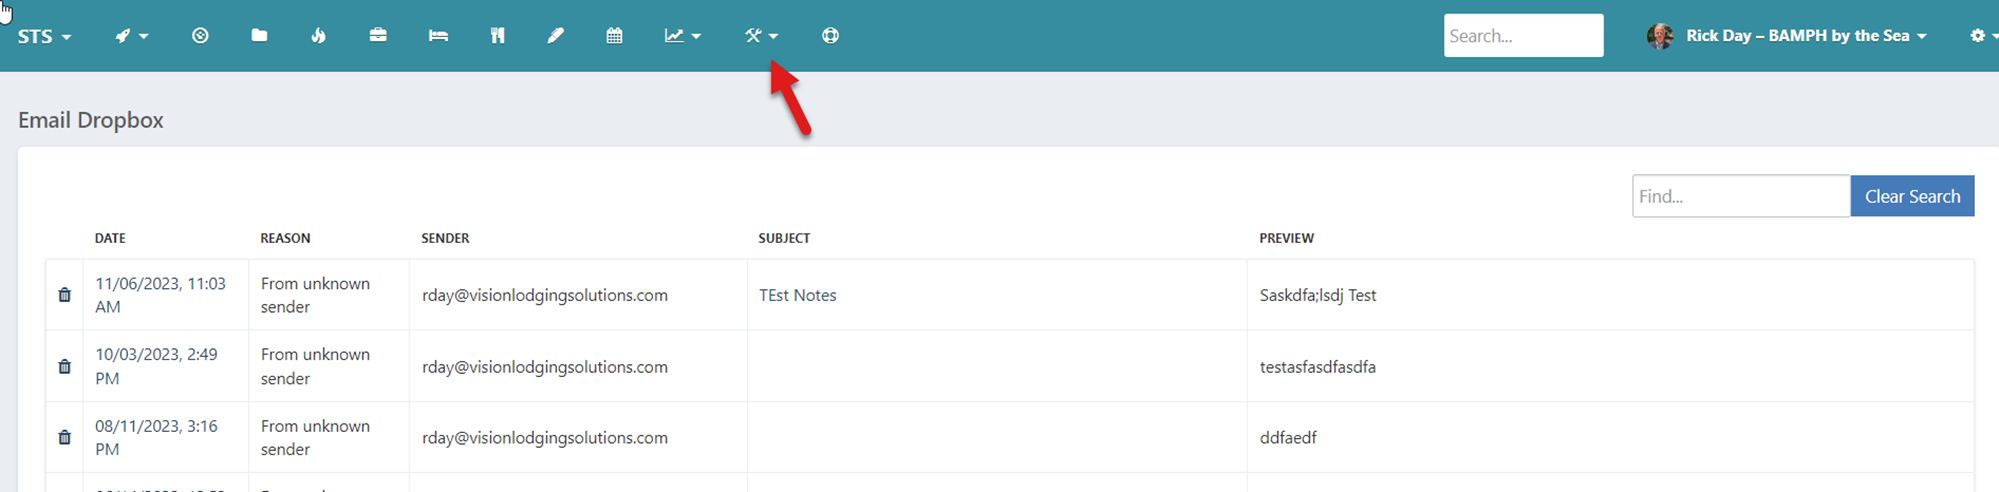
1. Click the Tools icon in the top menu bar
2. Click Email Dropbox
3. Once the screen opens, you should ideally see no emails listed. This will indicate all emails sent into STS have been matched to your contacts.
4. If an email is listed here, it means that STS could not find a client email address.
5. Click the subject line of the email listed.
6. On the next screen, click Create New Activity from the Email button.

7. Lookup the account to move the email to, and select it in the Account Name.
8. Scroll to the bottom and click Save.
9. The Email will move into the correct account.