Utilizing E-Signature and Digital Authorizations with Sertifi
To activate integration with Sertifi, please first reach out to our support team at support@salesandcatering.com to have this feature enabled within your property's STS Cloud account. During this process, our team will:
- Ensure you have an existing Sertifi account with e-Signatures enabled, if you would like to send contracts for signature using this integration.
- Ensure you have Digital Authorizations enabled within your Sertifi account, if you would like to send Credit Card Authorization forms using this integration.
- Walk you through connecting Sertifi to STS Cloud by entering your Sertifi API Key into your STS Cloud settings. Detailed instructions on how to do this can be found in our Sertifi Connectivity article.
- Set your contracts and other merge documents with the necessary e-signature merge tags that are supported by Sertifi.
- Provide any training or other assistance needed to get you started sending agreements with Sertifi.
Sending Booking Agreements/Documents for E-Signature
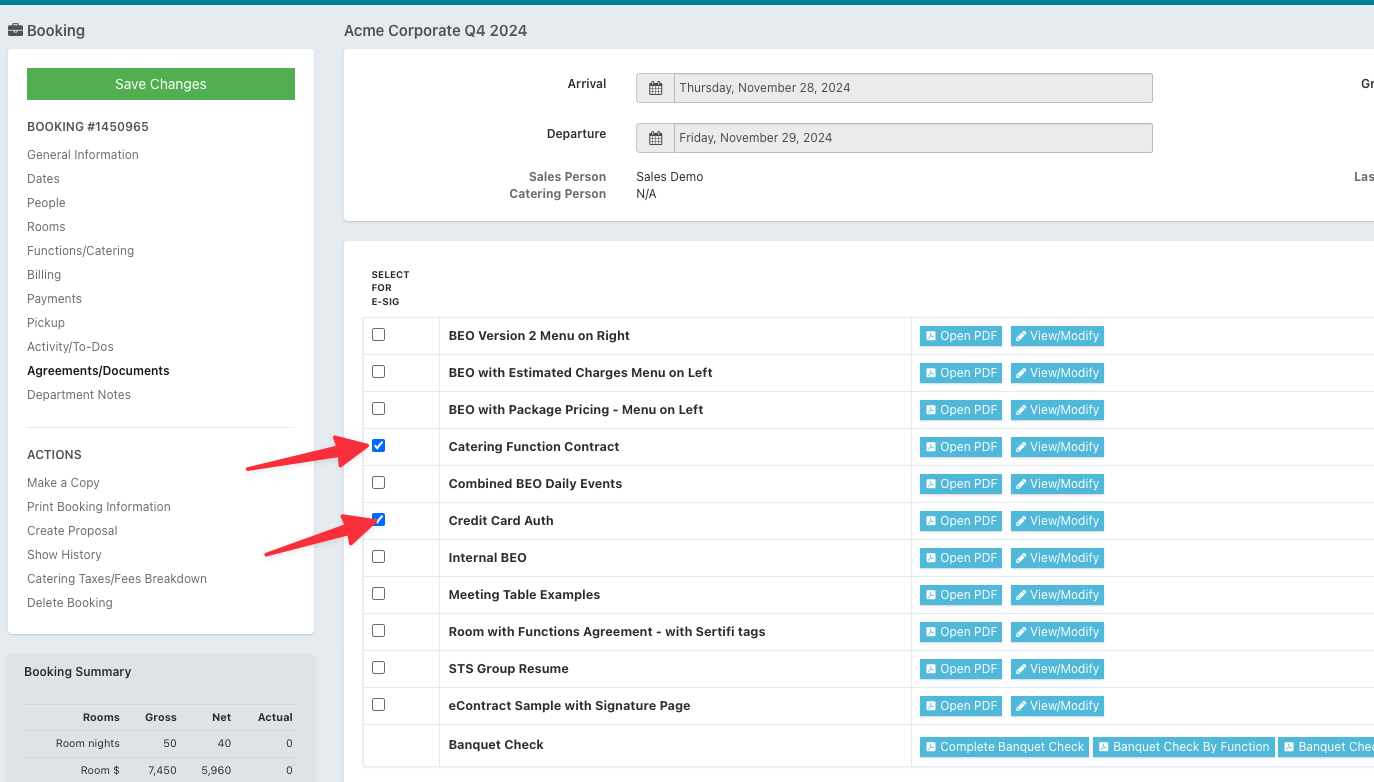
Start by selecting the 'Agreements/Documents' tab in any booking. Then, select the documents you'd like to send for e-signature by checking the box next the the document name. If you'd like to preview the agreement prior to sending, select 'Open PDF' or if you'd like to make changes to the agreement prior to sending, select 'View/Modify'.

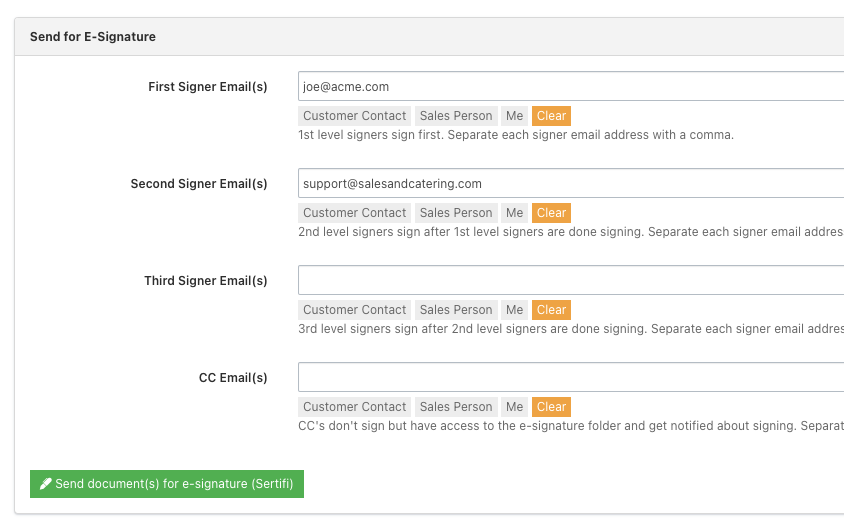
Next, confirm who needs to sign and the correct order. The order of the individuals must match the signing order on the documents. For instance, if our Catering Function Contract requires the customer to sign first, then a countersignature from the sales manager, it has to be set up the same way here. You'll also notice there are convenient buttons to select from the customer contact, the sales person, and the currently logged-in user, so entering email addresses manually is usually not necessary.

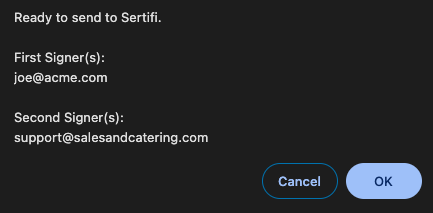
Finally, click the "Send document(s) for e-signature (Sertifi)" button. You'll be presented with a final confirmation dialog:

Then click "OK". This will create a new folder in Sertifi with the configured documents and send notification emails to the first signer(s).
As the signing process progresses, you will receive email notifications as configured within Sertifi. You will also see updates in the Agreements/Documents tab of the booking:

You can jump over to the folder view in Sertifi at any time by clicking 'View Folder.'
Sending Volume Contracts for E-Signature
Sending volume contracts for e-signature from within an Account works in a very similar way to booking documents. First, head over to an account for which you've already created a Volume Contract. In the right-hand sidebar, you'll see the Volume Contract:

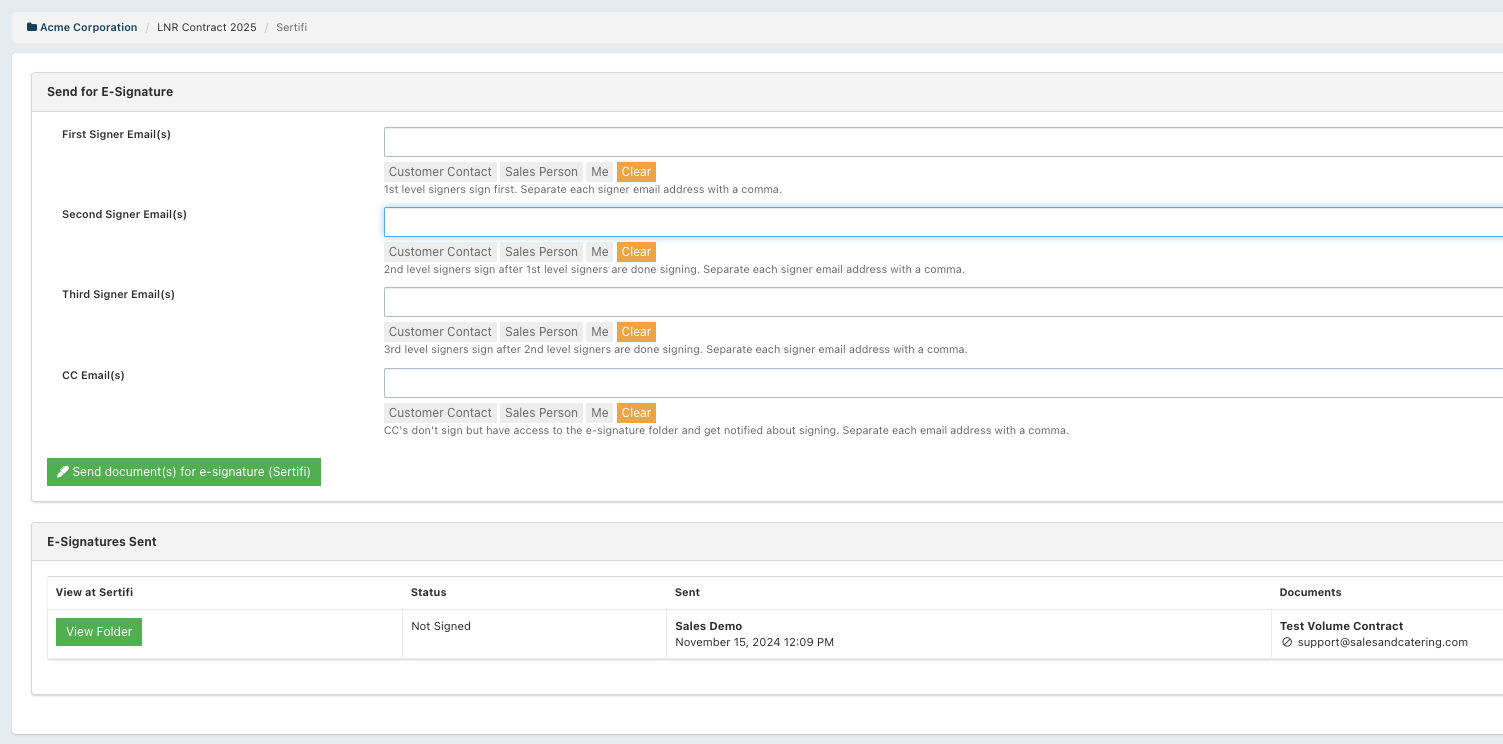
Click the "Sertifi" button, and you'll be taken to a new page where you can send the Volume Contract for e-signature.

Here, you can configure and send the e-signature in the same way you would a booking contract. Live updates on the status/progress of the Volume Contract's e-signature process can also be found here.

