Adding Sections
Available on our premium proposal templates
Also must have manager permissions to access
A Section is a reusable content block — complete with a title, rich-text body, images, and links — that you build once and can drop into any number of proposal templates. Think of Sections as polished, pre-written "chapters" for your proposals. Instead of re-typing the same venue description or dining overview every time, you create it once and pull it into whichever proposals need it.
Anatomy of a Section
When you create or edit a Section (go to ProposalPath → Sections → New Section or click Edit on an existing one), you'll see four main fields:
Slug — A single unique word (no spaces) that identifies the section internally, e.g. tropicfallsbohemian. This is used behind the scenes and won't appear to clients.
Title — The display heading that appears on the proposal document, e.g. Tropic Falls Water Park.
Body — A full rich-text editor where you write your section content. You can format text, add hyperlinks, embed images inline, and even insert raw HTML. This is the heart of your section — use it to tell a compelling story about a venue, amenity, or service.
Media — A gallery of images you can attach to the section. Your entire property photo library is available here; simply select the images that best represent this particular section's topic.
Link Sets — Optionally attach one or more Link Sets to the section. When a link set is selected, all links from that set will automatically appear within the section on the proposal, making it easy to direct prospects to virtual tours, menus, or floor plans without editing each proposal individually.
How Sections Connect to Templates
A Section doesn't automatically appear in proposals until it's added to a Template. Here's how that works:
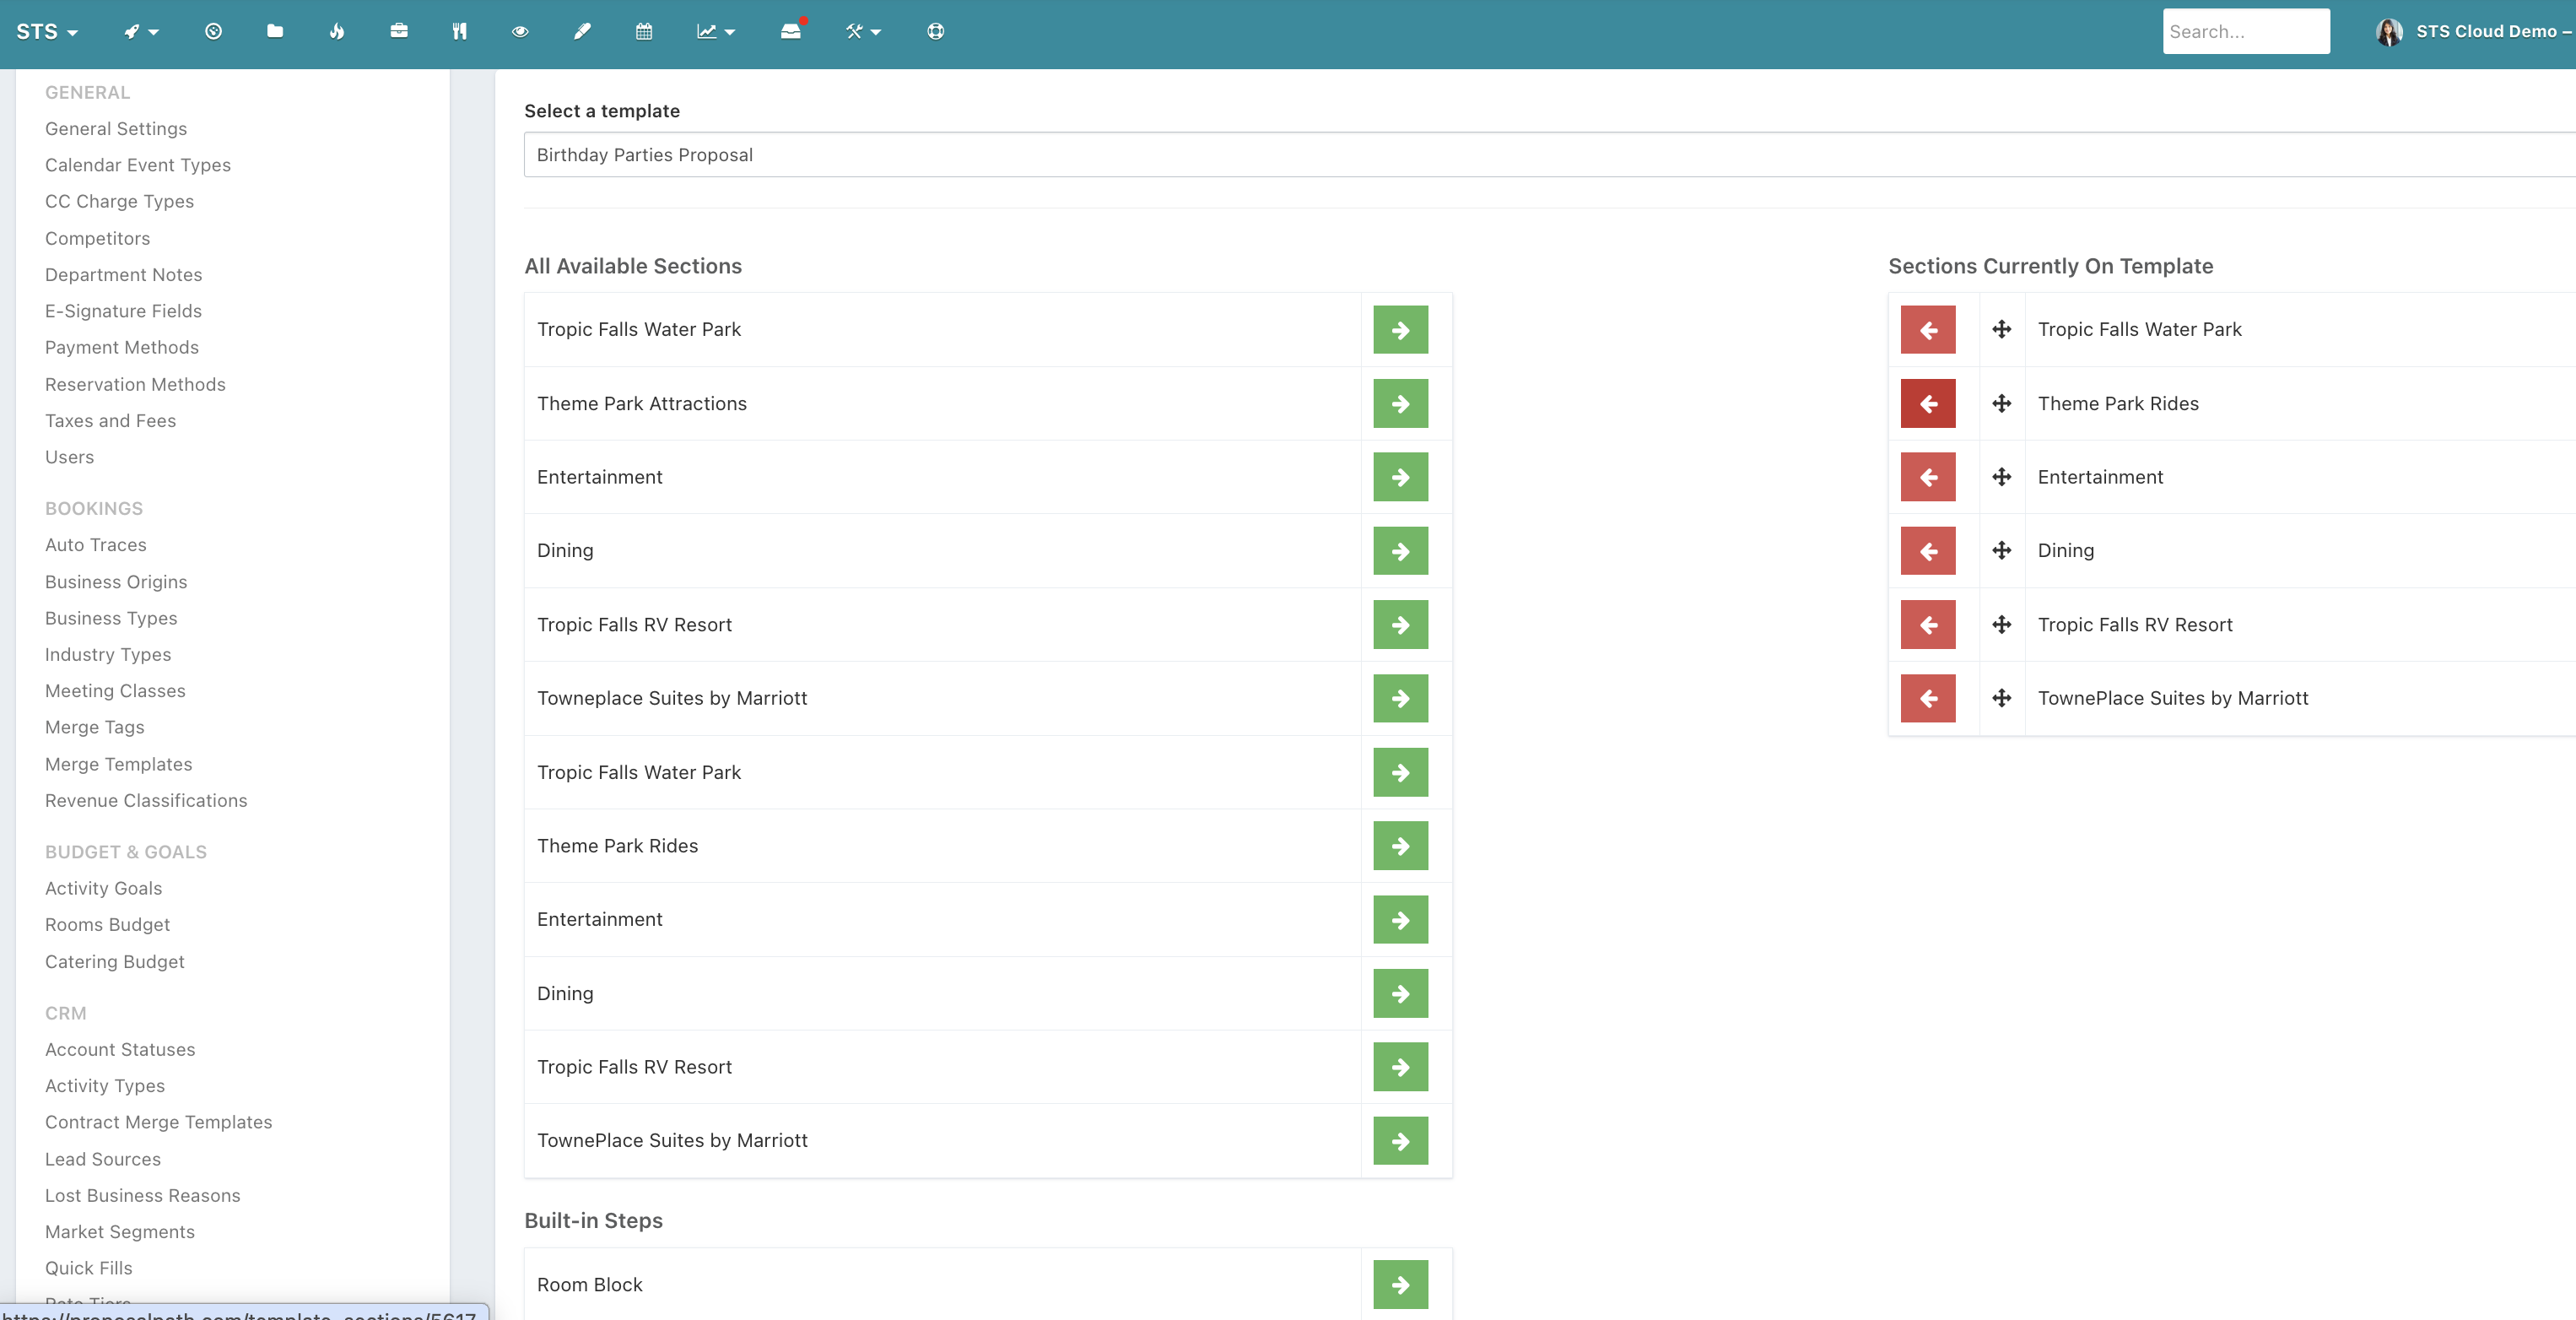
From the Sections list, click Configure Sections on Templates in the top-right corner.
Use the Select a template dropdown to choose which proposal template you want to configure (e.g., Birthday Parties Proposal, Groups Proposal).
You'll see two columns: All Available Sections on the left and Sections Currently On Template on the right.
Click the green arrow (→) next to any section to add it to the template. Click the red arrow (←) to remove it.
Use the drag handle (+) on sections in the right column to reorder them — the order here becomes the order they appear in the generated proposal.
The same section can be added to multiple templates simultaneously. On the main Sections list, the colored tags next to each section title (ie. Groups Proposal) show you at a glance exactly which templates that section already appears.
Why Sections Enhance Your Proposals
Consistency — Every proposal that includes the "Dining" section, for example, presents the exact same polished content. No more copy-paste errors or outdated descriptions slipping through.
Efficiency — You write each section once. Need to update your water park description after a renovation? Edit the section in one place and every template that uses it is instantly up to date.
Flexibility — A section can belong to one template or many. You can tailor a Bohemian Events-specific version of "Tropic Falls Water Park" and a separate, broader version for Groups Proposals — each crafted for a different audience.
Rich Media — The combination of formatted text, a photo gallery, and dynamic link sets means each section is a fully self-contained, visually compelling piece of collateral, not just a block of text.
Speed at Proposal Time — Because your templates already have the right sections pre-configured and ordered, generating a proposal for a new lead is fast and reliable. Sales staff spend their time personalizing the financial details, not hunting for the right venue photos or rewriting amenity copy.
Quick-Start Checklist
Plan your content blocks — List the topics every proposal for a given market segment needs (venue overview, dining, entertainment, accommodations, etc.).
Create a Section for each — Go to Sections → New Section, fill in the slug, title, body, and media.
Assign Sections to Templates — Use Configure Sections on Templates to pull the right sections into each proposal template and set their order.
Review and update as needed — When a property feature changes, simply edit the Section; all templates benefit immediately.
That's the full loop. Sections keep your proposals consistent, professional, and quick to produce — so your team can focus on closing, not formatting.